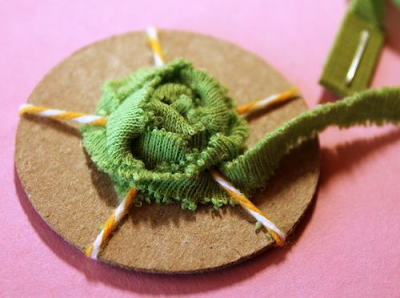
I came across this Spider Rose tutorial over on the Scrapbook & Cards Today blog and it is too good not to share here!!
Spider Rose Tutorial
By Becky Fleck
To begin, you will need some basic supplies:
t-shirt, patterned paper, cardstock, chipboard, circle punch, baker’s twine, button, chipboard sticker, wet and dry adhesive, foam adhesive, tape
Before we create the flower, I wanted to mention a couple of things about the type of fabric you use. The t-shirt that I upcycled happened to be an interlocking weave, so it was quite stretchy in all directions. This technique will work great with 100% cotton, but you may need more thin strips of fabric to finish the rose. I liked the interlocking fabric because when you stretch out the strip, it crinkles and frays:
To start, punch out a circle from a piece of chipboard. For this example, my circle is 1¾”. Punch a small circle in the center. Mark five points around the perimeter of the circle with a pen.
Cut a 12” length of baker’s twine. Slip one end into the center hole and tape it off on the back. Wrap the twine in and out of the center hole, running the “spokes” up to each pen point, until you have five spokes. Tape off the opposite end onto the back of the chipboard circle.
This is what it will look like from the front side, where you will be working:
Cut several thin (1/4”) strips of your fabric. The tension you use while creating the flower will determine how many strips you need. I cut four, but ended up only needing three of them. Slip one end of a fabric strip into the center hole and tape or glue off on the back to secure.
Fold a thin piece of scrap cardstock over the other end and staple it in place. This will act as a sewing needle for your strip:
Begin winding the fabric strip around the spokes, going under one spoke, skipping the next, under the next spoke, and so on. Allow the strip to twist for added dimension. The looser your tension, the fuller the flower will be. Here’s what it will look like at the start:
Continue “sewing” the strip in and out of the spokes. When you reach the end of one strip, tuck it under the previous row with glue, then glue the end of a new strip in the same spot. Staple another piece of cardstock to the other end of the strip and continue on.
After two strips of fabric:
And the completed spider rose:
Top off the flower with a button and add to the front of a card. You’re done!


No comments:
Post a Comment